
WordPress plugins can help optimize the technical performance of your website, its user experience, or its design.
But there are currently more than 59,000 WordPress plugins available.
So, how can you possibly sift through these thousands of plugins to find the ones you really need as a B2B marketer?
To give you some help, we’ve put together a list of the 10 best WordPress B2B marketing plugins for your website. And what’s more, they’re all free.
1. Optimize for SEO with Yoast
Your website won’t really start to be successful until you have a well thought out SEO strategy in place. This involves writing content that is optimized for search engines, both in terms of its quality and technical SEO.
This includes:
-
- Adding a meta title and meta description to content, which are displayed by search engines like Google in search results
- Optimizing content for a specific search query
- Using titles and subtitles to clearly structure your article
- Well-designed internal and external links
- Images with appropriate alt text attributes
- Ensuring that website content can be indexed by search engines
- Incorporating added-value elements like a contents section or FAQ
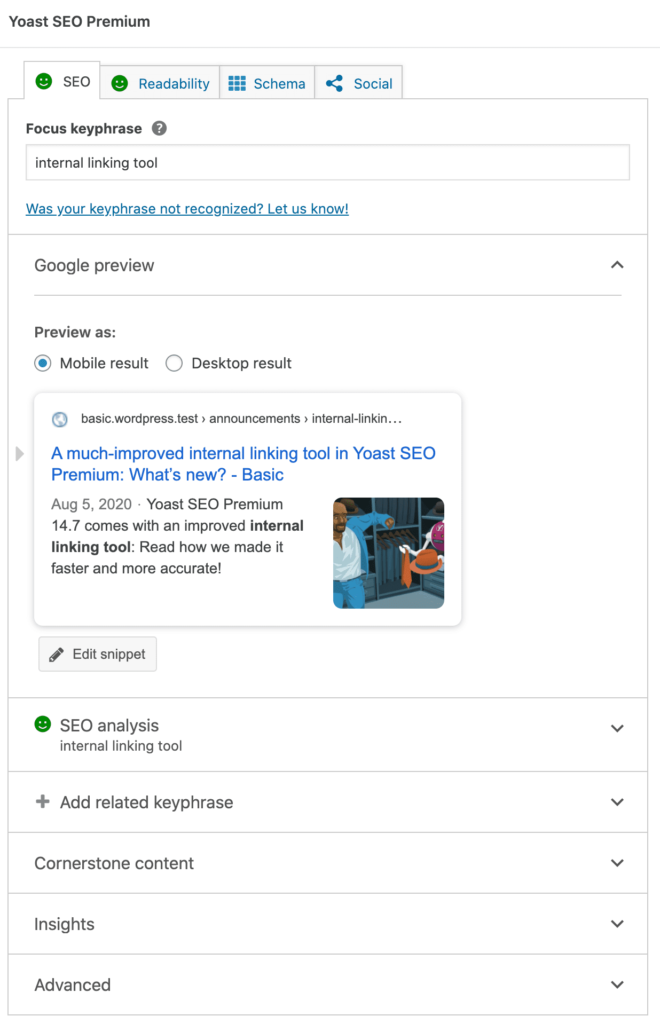
This is an incomplete list and yet it’s already quite a long one. Fortunately, there is a plugin that will help you optimize content for organic search: Yoast SEO.
In just a short space of time, Yoast has become the leading plugin to optimize a WordPress website for SEO.
The free version gives you all the features you need to ensure that content is optimized for SEO. This will give it the best possible chance of appearing on the first page of Google search results.
 Another SEO plugin: All in One SEO Pack
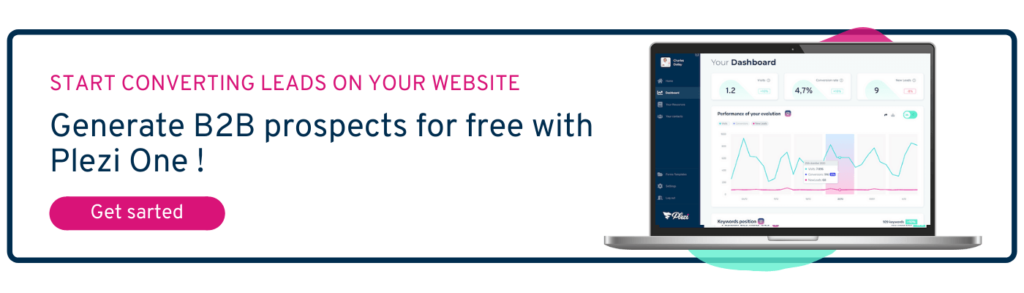
2. Create online forms with Plezi One
Having website visitors is good. But having leads is even better. And the one thing you need to have to change visitors into leads is an online form for your website.
An online form is the perfect tool to turn an anonymous website visitor into an identified and qualified lead.
There are a number of different reasons to have visitors fill in an online form on your website: in exchange for written content (e.g., a guide, brochure, or case study) or video content, for a contact enquiry, or to request a quote or a demo.
You can use our Plezi One WordPress plugin to easily add forms to your website.
This free plugin lets you create forms for different resources, send recipients an automated thank you email, and then track the leads generated as a result.
 Plezi One can be easily integrated with most WordPress page builders and lets you add forms to any of your pages using drag and drop.
3. Optimize images with Imagify
The search engine’s algorithm looks at more than 200 different criteria when ranking your website.
One of the most important of these is the optimization of images.
The bigger an image’s file size, the longer the web page on which the image appears will take to load, and the less-highly Google will rank it.
You can think of Google as being a bit like a lazy mover, who prefers lifting lightweight boxes to the heavy furniture at the back of the truck. If you want your web pages to rank well, you need to make the boxes as light as possible.
Luckily, there’s an easy-to-use plugin that will let you do just that: Imagify.
Imagify will compress your image files without affecting their quality. This will reduce the size of your website and shorten its load time.
The plugin can also run in the background, letting you compress images that are already online and automatically compress new images when you add them to your website.
The free version offers 20MB a month, equivalent to processing around 200 images. The premium version has more features and will process an unlimited number of images for USD 9.99 a month.
And it will really save you time when creating content. At Plezi, we previously compressed images using TinyPNG. But Imagify eliminates the need to go to an external website when creating our blog posts.

Another plugin to optimize images: Smush
4. Check links with Broken Link Checker
When you’ve got a website, managing links is all part of a day’s work. And with links to blog posts or other content, links to partner websites or other websites that you cite as a source, the number of links you need to keep track of can quickly feel overwhelming.
What’s more, the pages that these links send visitors to are also subject to change. They can be modified, replaced, or deleted altogether. And that can cause your links to be broken.
Internet users don’t like broken links. They can feel frustrated by not being able to access the content that was promised and having clicked on a link for nothing. Search engines also don’t like broken links, and they will penalize your website as a result.
To keep both visitors and search engines happy, you need to closely manage the links on your website and fix them as soon as possible if they become broken.
That’s where Broken Link Checker comes in.
This plugin analyses your outbound links (both internal and external) and identifies those that are broken (404), those that redirect to another page (301 or 302), and those that work exactly as they should (200).
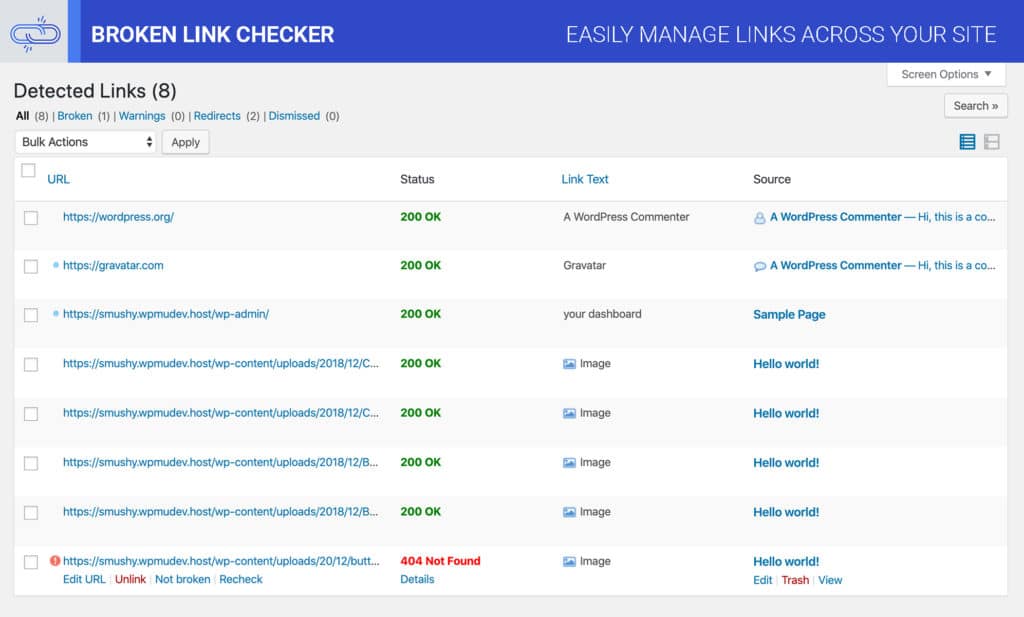
This makes it easy to update or remove links on your website.
5. Create website redirects with Redirection
Whoops! Using Broken Link Checker, you’ve just realized that one of your internal links is broken. The reason? You’ve recently changed the URL address of one of your blog posts.
To stop this from resulting in a broken link, you need to add what is called a redirect. A redirect tells browsers that the old URL address should automatically send visitors to the new URL address.
By doing so, a visitor to your website who clicks on or enters the old URL will arrive at the right page without realizing that they’ve been redirected.
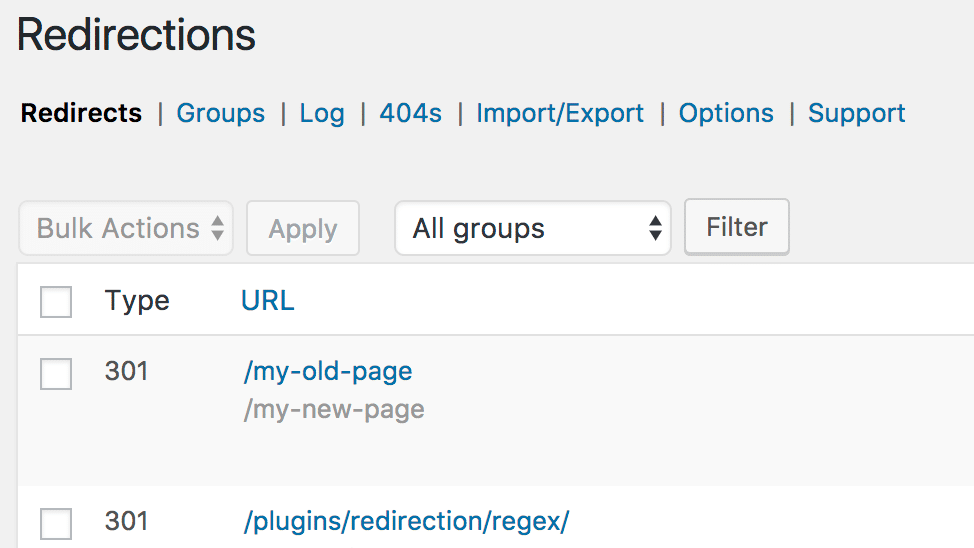
You can use the appropriately named Redirection plugin to create these website redirects.
Redirection is both free and easy to use, and lets you manage and create redirects in just a few clicks.
Other plugins to manage redirects: SEO Redirection and 301 Redirects.
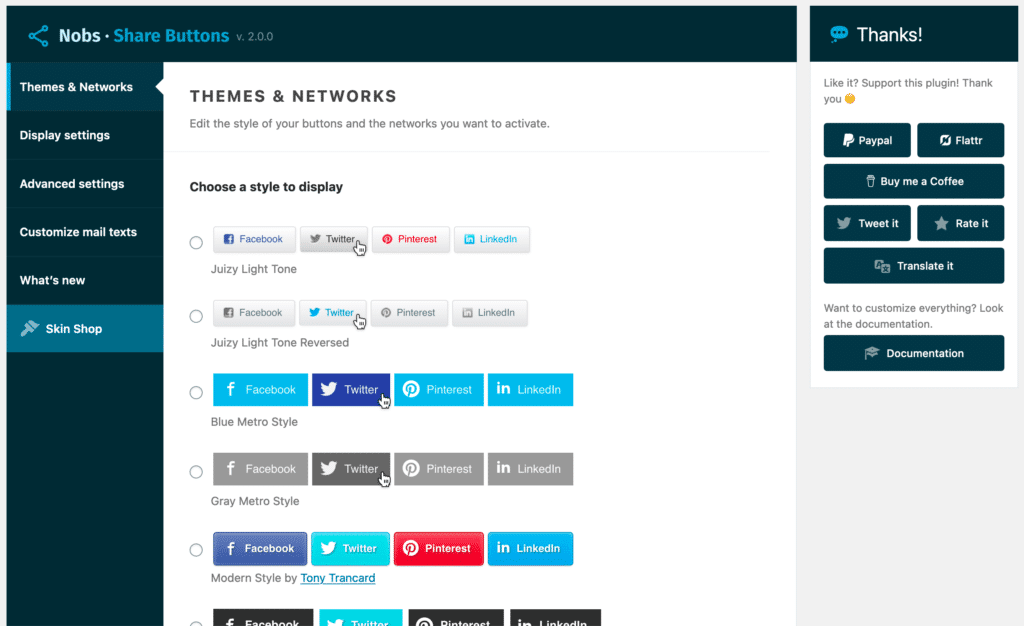
6. Optimize content for social media with Nobs
We’ve already talked about optimizing content for SEO and converting leads, but you also need to optimize it for sharing on social media.
Imagine an ideal world where each website visitor shares your content with their social media network. By doing this, each visitor will bring other visitors to your website, who in turn bring you even more visitors, and so on. If this was actually the case, you would quickly find yourself in charge of a media empire.
But you can make this world slightly more of a reality if you use the Nobs plugin to optimize posts for sharing on social media.
This free WordPress plugin lets you add buttons to content for social sharing (or by email), and to configure sharing messages to make a visitor’s social profile appear as the source.
It’s a great way to encourage website visitors to share your content.
Other social sharing plugins include ClicktoTweet and Shared Counts.
7. Manage comments with Akismet
Want to give website visitors a chance to interact with your content? To do this, you can add a comments section under your blog posts.
Comments are a great way to collect feedback and tips from visitors to your website. But comments can also be targeted by spam bots and those who take the opportunity to promote their own website, even when it has no connection to yours.
You can use the Akismet plugin to ensure all comments are relevant to the blog post in question and that you don’t get any spam.

Akismet lets you manage comments posted to your website and detect potential spam. The plugin also keeps a history of users and published messages.
8. Send notifications with OneSignal
When you publish a new blog post, it would be great to able to notify previous visitors to your website. For example, you could send them a message that said “Hi, we’ve just published a new post which we thought might be of interest”.
Unfortunately, this would be far too time-consuming a task (and probably a bit creepy for the visitor concerned!).
But the OneSignal plugin certainly lets you do the next best thing.
It lets visitors to your website receive notifications in their browser when you do things like publish a new blog post, launch a special online deal, or organize an event.
On their first visit, users are invited to sign up to your notifications. They will then be alerted of your next marketing actions.
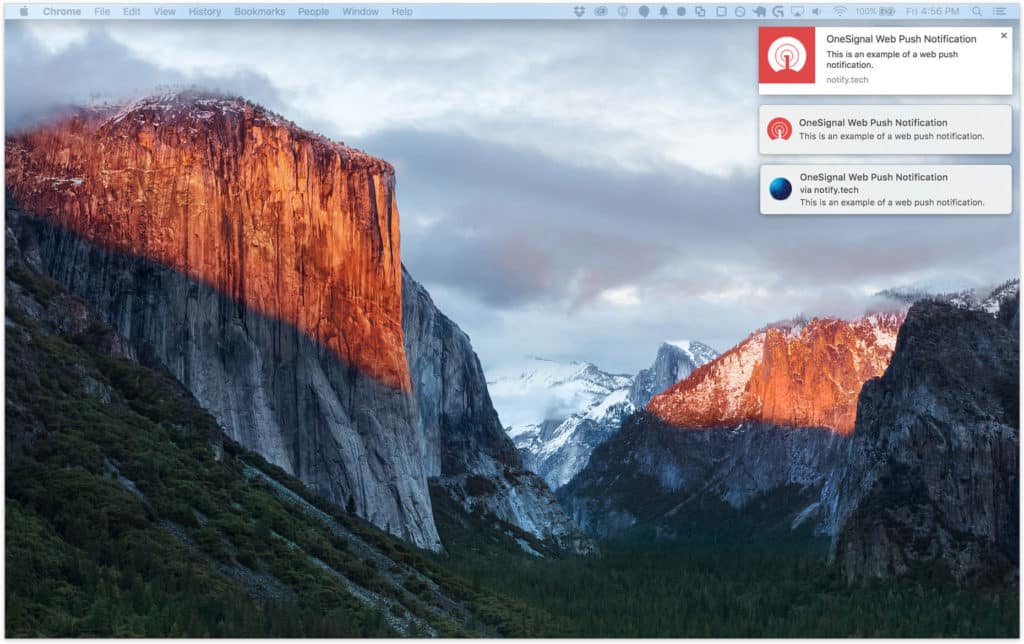
This is a very handy tool to have, but you need to take a bit of care when using it. Notifications can quickly become intrusive for those who have chosen to receive them.
9. Create calls to action with MaxButtons
Want to create great looking buttons for your website? You can do it using the MaxButtons plugin.
MaxButtons is a great way to create call to action buttons that really stand out.
Calls to action are now an essential part of converting website visitors into leads. You can use them, for example, to direct visitors to other content of interest or to landing pages.
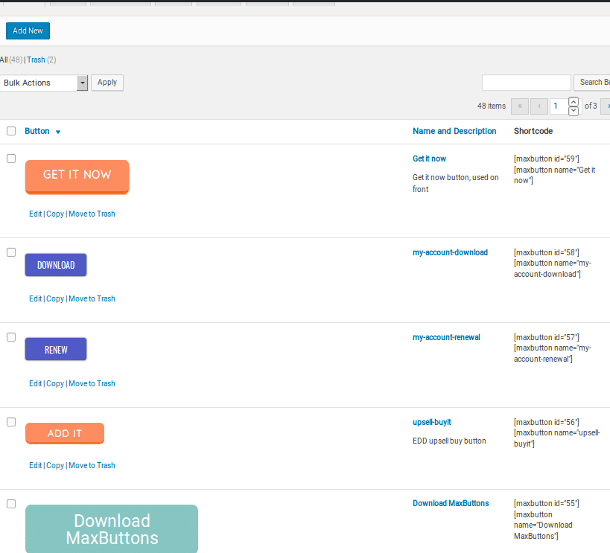
MaxButtons lets you easily create call to action buttons that match your company’s visual identity and insert them into your web pages.
10. Manage a multilingual website with TranslatePress
Do you want to target an audience in a foreign market?
To ensure that your brand’s message is consistent across your different markets, your website and content needs to be available in more than one language. You also need to be able to offer visitors from different markets the same user experience.
The TranslatePress plugin will make this job easier.
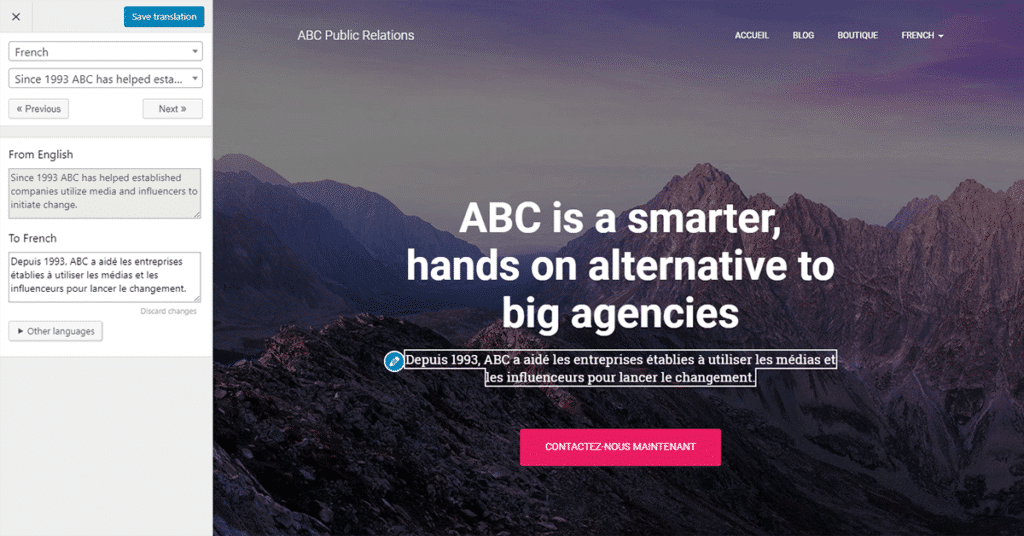
It can help you translate the content of your website, either using the services of a translator, or automatically using Google Translate. The free version also lets visitors choose their language from the website menu.
How to install a WordPress plugin:
It’s easy to install plugins in WordPress.
- Log in to your WordPress admin panel
- In the left menu, go to “Plugins”, then “Add New”
- In the top bar, you can search for the name of the plugin you want to download and install.
- Once you’ve found it, click “Install Now”, and then “Activate”.
- All you have to do now is configure the plugin if required.
Hopefully this post has helped you learn more about some tools that you can use to improve the effectiveness of your WordPress website. If you still have questions about our free Plezi One plugin for creating online forms, you can find more information here.